Export or Import a Site
Note: For detailed information about migrating sites from Tableau Server to Tableau Cloud, see our Tableau Cloud Manual Migration Guide(Link opens in a new window).
You can provision a new Tableau Server site by importing (migrating) information from another site. You do this by exporting the existing site’s (the source site) information to a file. Then you complete steps to verify and import that information to the target site.
Site Migration Options
You can migrate a site in any of these ways:
-
To another site on the same Tableau Server instance.
-
To a site on a separate Tableau Server instance.
-
From Tableau Server on Windows to Tableau Server on Linux or vice-versa.
Note: When migrating sites between instances of Tableau Server, the target site must be on a version of Tableau Server that is the equal to or later than the version of Tableau Server for the source site. Both the source and target sites must be from supported versions of Tableau Server.
Site Migration Limitations
What information is preserved in a site export
-
The export file you create preserves workbooks, projects, data sources, and users. This includes permissions set on content, user favorites lists, and site quotas.
-
Users’ custom views are preserved; however, depending on the type of site migration, custom view URLs might change in a way that breaks users’ bookmarks to their views.
-
When you export a site on Tableau Server to import to another Tableau Server site, subscription and extract refreshes schedules are preserved.
What information isn't preserved in a site export
-
Usage data, which appears in the site’s administrative views, is not preserved. For example, view and data source counts, user actions, and performance data.
-
Backgrounder jobs that are in-progress while a site is being exported, will not be exported and will not show up on the new site once the import is complete.
-
OAuth access tokens embedded in data connections are reset. For those data sources, you will need to edit the connections and re-authenticate to the underlying data.
-
Prep flows and flow schedules are not included. These will need to be manually migrated.
-
Content saved to users' Personal Space is not included.
Prepare the Source and Target Sites
Before you export a site, complete the following checklist to prepare both environments. Some of these instructions depend on whether both sites are on the same server instance or on separate ones.
Delete stale content
Make sure the source site contains only what you want to import to the new site. As a best practice, remove anything from your source site that you do not want to include in your new site, whether these things will be included in an export/import, or will need to be manually migrated. Delete unused workbooks, data sources, or projects. If you have Prep flows or flow schedules you no longer use, delete these as well.
Remove obsolete users
Confirm that all server users are licensed, and remove accounts that are no longer in use. You can’t remove users during the import process, so if the two sites are on the same server instance, all users you export from the source site are imported to the target site.
Create or identify the target site
You must import a site file to a site that already exists on the target Tableau Server instance. Because the import process removes anything from the target site that is not included in the import file, we recommend that you import to an empty site. For more information, see Add or Edit Sites.
If your source site has workbooks that use published data sources, the data connections in these workbooks continue to refer to the source site name. To maintain those connections without having to republish the workbooks, make sure the target and source site names match.
Locate site IDs
The tsm command you use to export or import a site requires a parameter that takes the site ID. You can get the site ID from the URL when you are signed in to the site from a web browser.
If only one site exists on the server, that site is named Default. When you are signed in to the Default site, the browser URL looks something like this:
https://server-name/#/projects
In the URL, the absence of the /site parameter indicates that it’s the Default site. The site ID for the Default site is "Default" without the quotation marks.
On a multi-site Tableau Server deployment, the browser URL includes #/site/ followed by the site ID. The following URL would appear if you navigate to the Views page on a site whose site ID is finance:
https://localhost/#/site/finance/views

Check the identity store
You can export from and import to sites that do not use the same user identity store type, but you will need to modify the mapping files used for the import. This step is built into the import process and described in Step 3: Verify that site settings are mapped correctly.
Create users on the target server if necessary
The site import process assigns users to the target site. If the source site is on a Tableau Server instance other than the target site, you must create users on the target server before you can perform the import. If the two sites are on the same Tableau Server instance, the target site has access to the existing users, and you can skip this step.
Configure the target server to deliver subscriptions
Subscriptions are imported, but you must configure the server to deliver them. For more information, see Set Up a Site for Subscriptions.
Check schedules
The Schedules page lists the existing schedules for extract refreshes and subscriptions.
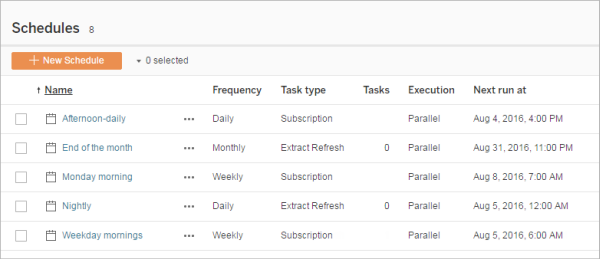
For migrations from one Tableau Server site to another, refreshes and subscriptions assigned to default schedules on the source site are mapped to the same schedules on the target site. If the source site has schedules that do not exist on the target site, and the target site is on another Tableau Server instance, you must create the schedules on the target site that you want the source schedules to map to. You can edit the mapping files to make sure this is done as you expect.
Tips for importing to a target with fewer users or schedules
When a target site has fewer users or schedules than the source site, many-to-one importing is not supported. How you can address this depends on whether the source and target sites are on the same Tableau Server instance.
You can take any of the following approaches that apply to your site migration use case:
-
Remove extra users or schedules from the source site before you export. This is the preferred option if the two sites are on the same server instance.
-
Add missing users or schedules to the target site before beginning the import. This is required if the target site is on another server instance.
-
Add the missing users or schedules to the target site in the middle of the import process and manually update the mapping files. This is an option only if the sites are on the same instance.
-
Manually map the users or schedules to different users and schedules in the target site during the import process. This is required if a user name differs between servers—for example, the exported user named adavis@company.com is defined on the target site as davisa.
Migrating a Site
You must use the tsm sites commands to complete the site migration process. The steps below walk you through exporting information from the source site, mapping site settings, and importing the mapped files to the target site.
Step 1: Export a site
On the source Tableau Server machine, type the following command:
tsm sites export --site-id <source-siteID> --file <filename>
Tableau Server must be running when you use the export command. During the export process, Tableau Server locks the site you are exporting.
For example, to export a site with site ID weather-data to the file export-file.zip, type the following:
tsm sites export --site-id weather-data --file export-file
By default, Tableau Server saves <export-file>.zip to C:\ProgramData\Tableau\Tableau Server\data\tabsvc\files\siteexports. For more information, see tsm File Paths.
Step 2: Generate the import mapping files
To generate import files for the target site, you need the .zip file you created when you completed the steps in Step 1: Export a site.
-
On the target Tableau Server machine, copy the exported .zip file to the directory Tableau Server expects to find the files for importing. For example:
C:\ProgramData\Tableau\Tableau Server\data\tabsvc\files\siteimports -
Verify that the target site already exists on Tableau Server, as the import process will not create a new site. For more information, see Prepare the Source and Target Sites.
-
Run the following command on the target Tableau Server machine (Tableau Server must be running):
tsm sites import --site-id <target-siteID> --file <export-file.zip>This command generates a set of .csv files that show how source site settings will map to the target site. In the steps described in the next section of this article, you confirm these mappings and adjust them where needed.
By default, these .csv files are generated to a
mappingsdirectory created undersiteimports. For example:C:\ProgramData\Tableau\Tableau Server\data\tabsvc\files\siteimports\working\import_<id>_<date-time>\mappingsFor more information, see tsm File Paths.
Step 3: Verify that site settings are mapped correctly
The .csv files you generated in the previous section describe how the source site’s resources will be assigned to the target site when the import is complete. Items in the files that Tableau Server was unable to map, and that you need to edit, are indicated by a series of question marks (???). Before you can complete the import process, you must replace the question marks with valid assignments on the target site.
Important: Some requirements apply to mapping users, schedules, and published content resources, particularly when the source and target sites are on separate Tableau Server instances. For more information, see Prepare the Source and Target Sites earlier in this article.
To verify mapping files
-
Navigate to the directory that contains the .csv map files generated by the
tsm sites importcommand. By default:C:\ProgramData\Tableau\Tableau Server\data\tabsvc\files\siteimports\working\import_<id>_<date-time>\mappings -
Use your preferred text editor to open one of the .csv files in the
mappingsdirectory, and do the following.-
Confirm that the mappings are correct.
-
If an entry shows a series of question marks (
???), replace them with a valid value.For descriptions of the settings in each of these files, use the tables in Mapping File Content Reference later in this article.
-
Save the changes and preserve the CSV file formatting.
Repeat this process for the remaining .csv files.
-
Step 4: Import the correctly mapped files to the target site
After you verify the site mappings in the .csv files, you can import the settings to the new site to complete the migration process.
-
Run the following command on the target Tableau Server machine:
tsm sites import-verified --import-job-dir <import-id-directory> --site-id <target-siteID>For example:
tsm sites import-verified --import-job-dir "C:\ProgramData\Tableau\Tableau Server\data\tabsvc\files\siteimports\working\import_ff00_20180102022014457"
--site-id new-site -
When the success message appears, sign in to the new site and confirm that everything was imported as you expected.
Note: The tsm sites import and tsm sites export commands can leave a site in a locked state if an error occurs. To unlock a site, use the tsm sites unlock command.
Mapping File Content Reference
The following tables list the columns in each of the mapping files created when you run the tsm site import command.
CSV file name: mappingsDomainMapperForGroups
|
Column title |
Can it be edited? |
Description |
|---|---|---|
|
source_name |
No |
A user group name on the source site. |
|
source_domain_name |
No |
The identity store type on the source site: either local (for local identity store) or a domain name (for Active Directory or LDAP external identity store). |
|
target_domain_name |
Yes* |
The identity store type on the target site: either local for local identity store, or a domain name (such as example.com or example.lan) for Active Directory or LDAP external identity store. *For the All Users group, keep the target_domain_name value set to local, even if your target server is configured for Active Directory identity store. The All Users group is a special default user group that must exist on every Tableau Server. |
CSV file name: mappingsScheduleMapper
|
Column title |
Can it be edited? |
Description |
|---|---|---|
|
source_name |
No |
The names of custom and default extract or subscription schedules on the source site. |
|
source_scheduled_action_type |
No |
The type of schedule, either Refresh Extract, for extract refreshes, or Subscriptions, for subscription deliveries on the source site. |
|
target_name |
Yes |
The names of custom schedules on the target site. You can edit this value. For example, if the schedule is named Friday Update on the source site you can rename it Friday Refresh on the target site. |
|
target_scheduled_action_type |
No* |
The type of schedule, either Refresh Extract, for extract refreshes, or Subscriptions, for subscription deliveries on the target site. *In the rare case that you see question marks ( |
CSV file name: mappingsSiteMapper
|
Column title |
Can it be edited? |
Description |
|---|---|---|
|
source_url_namespace |
No |
The site ID of the source site. |
|
target_url_namespace |
No |
The site ID of the target site. |
CSV file name: mappingsSystemUserNameMapper
|
Column title |
Can it be edited? |
Description |
|---|---|---|
|
source_name |
No |
The user name attribute of a user on the source site. |
|
source_domain_name |
No |
The identity store type on the source site: either local (for local identity store) or a domain name (for Active Directory or LDAP identity store), or external. |
|
target_name |
Yes |
The user name attribute for users who will be assigned to the target site upon import. Confirm that all the user names in the list exist on the target server, and replace question marks ( You cannot create user names by adding rows to the CSV file. Similarly, you cannot remove user names by deleting rows. You can edit a user name in the target_name column to be different from its source user name, as long as the user already exists on the target server with that name. For example, a user can have a source_name value of agarcia@company.com and a target_name value of ashleygarcia@company.com. You can map a user on the source site to only one user name on the target site. |
|
target_domain_name |
Yes |
The identity store type on the target site: either local (for local identity store) or a domain name (for Active Directory or LDAP external identity store). |
CSV file name: MappingsScheduleRecurrenceMapperWithAutoCreation
This file does not require updates.