Add Users to Tableau Server
You can add users to Tableau Server one at a time or in batches. You can add them to the server as unlicensed users, and then add them to sites and assign site roles as you onboard them to Tableau Server. Or you can add users to sites and specify their site roles at the same time, at which point they are ready to sign in.
Before you begin
-
If your Tableau Server is configured with an Active Directory external identity store, review User Management in Deployments with External Identity Stores to understand how multiple domains, domain naming, NetBIOS, and Active Directory user name format influence Tableau user management.
Note: In the context of user and group synchronization, Tableau Server configured with LDAP identity store is equivalent to Active Directory. Active Directory synchronization features in Tableau Server function seamlessly with properly configured LDAP directory solutions.
- Verify that you have enough user licenses and role licenses for your user base. If you attempt to add a user for a site role that you do not have a license for, then you will receive an error.
- To add user licenses to your Tableau Server deployment, visit the Tableau Customer Portal(Link opens in a new window) to purchase licenses and the corresponding product key(s). After you have purchased licenses, see Add Capacity to Tableau Server to update the server with the new key(s).
- The steps in this topic describe how to add an individual user and assign their site role. To add users in batches, see Import Users.
When adding users at the server level versus the site level
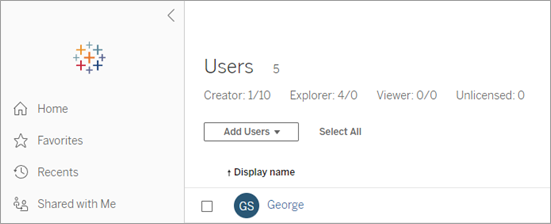
In a single-site environment, server administrators can add users on the Users page.
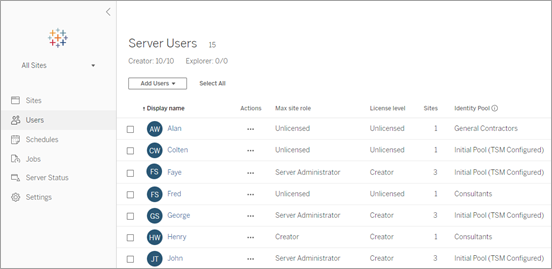
After you add a site to Tableau Server, it becomes a multi-site server with a Server Users page (all server users from every site appear here) and a Site Users page. Only server administrators can access the Server Users page, and both site administrators and server administrators can access the Site Users page.

The Server Users page is the only place where you can assign users to multiple sites, delete users from the server, and if the server is using local authentication, reset user passwords.
Add a user to the server
When adding a user, the workflow changes depending on whether at least one identity pool(Link opens in a new window) is configured for Tableau Server.
No identity pools configured
If no identity pools are configured, i.e., Tableau Server is only using the user provisioning and authentication configured during Tableau Server setup (also referred to as the initial pool (TSM configured)), follow the steps described below to add a user.
-
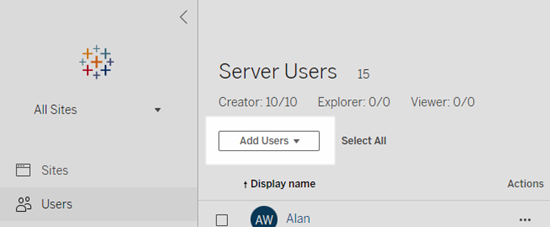
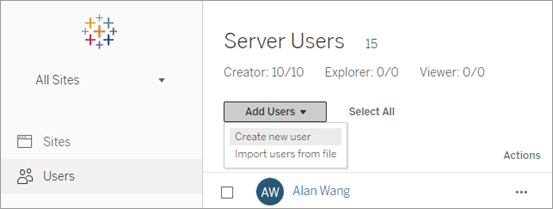
In the site menu, select Manage All Sites > Users, and then click Add Users.
To add a user to a site, you select the site and go to the Users page.
-
Do one of the following:
-
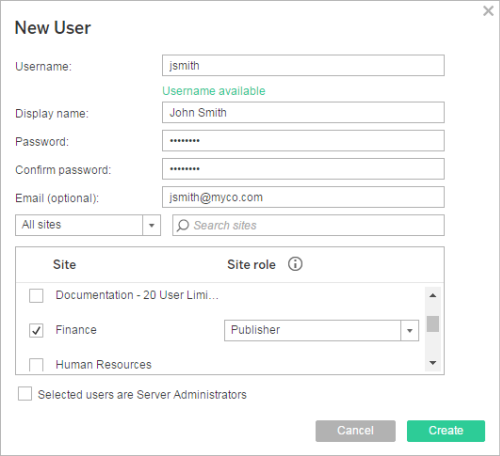
If the server is configured for local authentication, click New User, and enter a user name. With local authentication, the best way to avoid user name collisions is to provide an email address for the user name. For example, jsmith@example.com instead of jsmith.
User names are not case sensitive. Characters not allowed in user names include the semi-colon (;) and colon (,).
-
If the server is configured for Active Directory authentication, click Active Directory User. If you are adding a user from the same Active Directory domain that Tableau Server runs on, the server domain will be assumed, and you can type the AD user name without the domain.
Note: Do not enter the user’s full name; this can cause errors during the importing process.
-
-
If the server is using local authentication, provide the following:
-
Display Name—Type a display name for the user (e.g., John Smith).
-
Password—Type a password for the user.
-
Confirm password—Retype the password.
-
Email—This is optional and can be added at a later time in the user profile settings.
-
Selected users are Server Administrators: Specify whether the user should be a server administrator.
-
Name (Site Membership) / Site Role: If the user is not a server administrator, you can assign a user to zero or more sites, along with a site role for each site. You do not have to choose site membership and site role at this time. If you don’t specify site membership and site role for a new server user, the user will be added as a server user only, with a site role of Unlicensed. For details, see Set Users’ Site Roles.
-
-
Click Create.
One or more identity pools configured
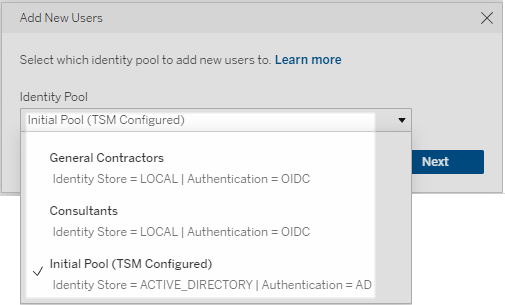
When adding a user, if one or more identity pools are configured, you must first select an identity pool or the initial pool (TSM configured), which is the user provisioning and authentication configured in TSM during Tableau Server setup.
-
In the site menu, select Manage All Sites > Users, and then click Add Users > Create new user.
To add a user to a site, you select the site and go to the Users page.
-
In the Add New Users dialog box, select the identity pool you want to add the user to.
-
Do one of the following:
-
If the identity pool you selected in step 2 is configured for LOCAL identity store and LOCAL authentication:
-
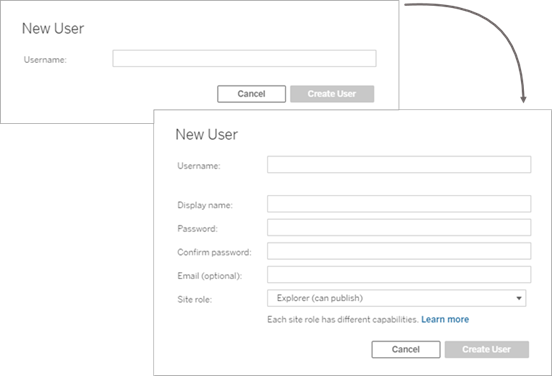
In the New User dialog box, in the Username text box, enter a user name. With local authentication, the best way to avoid user name collisions is to provide an email address for the user name. For example, jsmith@example.com instead of jsmith.
User names are not case sensitive. Characters not allowed in user names include the semi-colon (;) and colon (,).
-
Enter the following information:
-
Display name—Type a display name for the user (e.g., John Smith).
-
Password—Type a password for the user.
-
Confirm password—Retype the password.
-
Email (optional)—This is optional and can be added at a later time in the user profile settings.
-
Selected users are Server Administrators: Specify whether the user should be a server administrator.
-
Site Role: If the user is not a server administrator, you can assign a site role. You do not have to choose site role at this time. If you don’t specify site role for a new user, the user will be added as a server user only, with a site role of Unlicensed. For details, see Set Users’ Site Roles.
-
- When finished, click Create User.
-
-
If the identity pool you selected in step 2 is configured for LOCAL identity store with OIDC authentication:
-
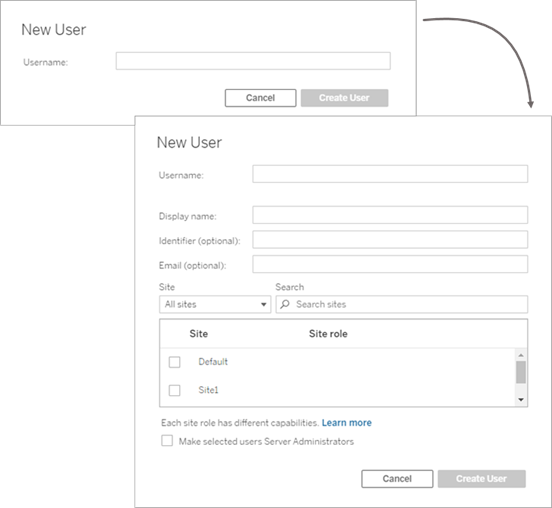
In the New User dialog box, in the Username text box, enter a user name. With local authentication, the best way to avoid user name collisions is to provide an email address for the user name. For example, jsmith@example.com instead of jsmith.
User names are not case sensitive. Characters not allowed in user names include the semi-colon (;) and colon (,).
-
Enter the following information:
-
Display name—Type a display name for the user (e.g., John Smith).
-
Password—Type a password for the user.
-
Identifier (optional)—Type the identifier you want to associate with the user. Identifiers are for identity matching purposes. For more information, see Usernames and identifiers in Tableau.
-
Email (optional)—This is optional and can be added at a later time in the user profile settings.
-
Site and Site role—If the user is not a server administrator, you can assign a user to zero or more sites, along with a site role for each site. You do not have to choose site membership and site role at this time. If you don’t specify site membership and site role for a new server user, the user will be added as a server user only, with a site role of Unlicensed. For details, see Set Users’ Site Roles.
-
Make selected users Server Administrators—Specify whether the user should be a server administrator.
-
- When finished, click Create User.
-
-
If the identity pool you selected in step 2 is configured for ACTIVE_DIRECTORY or LDAP identity store:
-
Type the AD or LDAP user name without the domain. In this workflow, you're adding a user from the same Active Directory domain that Tableau Server was configured with in TSM during Tableau Server setup. Therefore, the server domain will be assumed, and you can type the AD or LDAP user name without the domain.
Note: Do not enter the user’s full name; this can cause errors during the importing process.

- When finished, click Import Users.
-
-